

GETTING STARTED WITH CLUB AUTOMATION
The Greater Midland Tennis Center utilizes Club Automation Member Portals. This software and app allow you to sign up for classes, reserve courts and register for events.
BEFORE YOU SET UP YOUR ACCOUNT: It is crucial that your email address on file at the Tennis Center matches the email you enter to create your account. Otherwise, you will not be an authorized user in the system.
If you believe your e-mail to be incorrect, please contact the Welcome Center by calling 989.631.6151 or emailing MReservations@greatermidland.org.
DON'T FORGET TO DOWNLOAD THE APP: In conjunction with the member portal, you will now be able to fully utilize the app once your account is created. You may download the Apple app HERE or the Android app HERE.
*The app team is still working to make the 'book a court 'feature on the app functional. To book a court while this feature is currently unavailable on the app, you can log on through the web browser on your phone or use the desktop version.
SETTING UP YOUR ACCOUNT
For the first time you access the portal, you will need to use a web browser on a computer or tablet or the web browser on a mobile device. The button below will direct you to the proper site to create your account.
INSTRUCTIONS:

Step 1: Once you reach the portal login screen pictured below, locate and click “Access My Account" button listed under “First time here?”.

Step 2: After clicking that button, a “Register Now” window will open. Enter your first name, last name, and email address under “Find my account”. After entering your information, select “Search” in the bottom right corner.
Once your account has been identified, you will receive a prompt saying, “We found your account.” A verification email will be sent to your email address with the final login instructions. Please open your email to access these instructions.
*Please contact the Welcome Center at 989.631.6151 or email MReservations@greatermidland.org if your account access cannot be completed.

The email you receive includes a verification link that needs to be opened to complete the setup of process. Once the link is selected, you will be directed to an information page where you will enter/verify your personal information.

Step 3: Complete all required fields on the information page, agree to the standard liability waiver, and select “Save Account”. You will then be directed to the member portal home page!
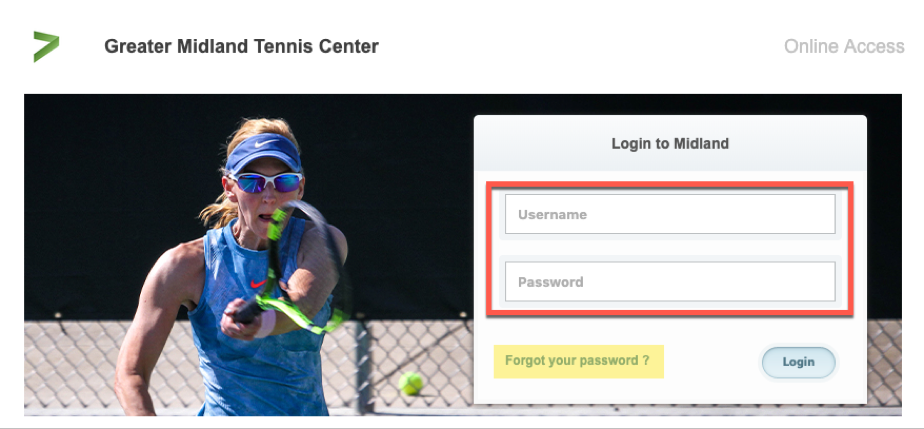
Step 4: You are all set to log in! Return to the login screen and enter your username (your email address) and password in the “Login to Midland” box.
QUESTIONS: If you have any problems accessing your account, select “Forgot your password?” and a new verification link will be sent to your email. If you need help accessing your account or the email you provided isn’t recognized by the system, contact the Welcome Center by calling 989.631.6151 or emailing MReservations@greatermidland.org for further assistance.
PORTAL OVERVIEW
HOMEPAGE: After you log in, you will be directed to what is known as the Home Page. The home page includes the following:

Current Balance and Membership Type – these will be listed just below your name
Club Announcements – be sure to review for any updates or announcements from the team at the club.
Upcoming Events and Registrations – listed on the right side of the home screen will be upcoming class or program registrations, court reservations, or private lessons.
Note: If you are the primary account holder, select the dropdown menu to the right of your name to navigate to different family members’ profiles
MEMBER PORTAL TABS: Located on the left side of the member portal are the tabs you will use to access your profile, classes, member statement, etc.

Home: Navigate back to the “Home” screen outlined above
View My Info: Update personal and billing information
Reserve a Court: Book new and/or edit existing court reservations
Register for Programs: Register for program sessions (not drop-in classes)
Register for Classes: Register for drop-in classes, i.e. cycling
View My Statement: Review charges and payments posted to your statement
Pay my Bill: Make online payments for outstanding charges on your account
Packages: View packages and usage
Account Access: Determine what linked family members can access on their portal
Notifications: Opt in or out of club email communications
VIEW MY INFO
From this tab you can update your personal and billing information, along with any linked members’ information when logged in as the primary member.
PERSONAL INFORMATION: To update your personal information, select “Edit” in the top right corner of the Personal Information box.

BILLING INFORMATION: To update your payment method, select “Edit” in the top right corner of the Billing Information box. Bill information can be updated on the primary account.

RESERVE A COURT

When selected, this tab allows you to create new court reservations on the indoor courts (and outdoor courts during the outdoor season).
Select “Reserve a Court” and follow the steps below to complete the reservation.

Where: Choose a surface type and court
Who will host: Select the family member scheduling the reservation and add additional players as needed.
When: Select the date first and then select the length of the reservation (30 minutes, 60 minutes, or 90 minutes)
Search & Pick A Time: After selecting “Search,” choose the time you want to reserve and the “Confirm Reservation” window will appear. Press Confirm and then OK to finalize the reservation.
Your Reservations: Your active reservations will display at the top of the screen under Your Reservations.
Edit/Cancel: If you need to edit or cancel, please click on the appropriate action to the far right of your reservation and follow the steps. Edit will allow you to change the names of the players or the time/day. Canceling a reservation will remove your reservation and free up the court. Please remember that there is a cancellation policy in effect.

REGISTER FOR PROGRAMS
This tab will allow you to register for all programs currently available for online registration. To complete your registration:
Begin by locating the program from the list provided. You can also narrow your search using the filters provided at the top of the page, i.e. keyword or by selecting from the drop down list of All Events.
Once you have identified the class you want to register for, either click on the class name or select “Learn More”.

Once you have selected the program name or learn more, all available sessions for the program will be listed. Select the green “Sign Up” for the class you would like to register for. If the class is not available for online registration, it will say “Not Yet Open” or “Please Call.” You can call the Tennis Center to get more information.

You will then be asked to select the person who will be registering for the class.

Note: if you are the primary account holder and have family members linked to your account, all eligible people will be listed in this screen.
After selecting the participant’s name, click “Add to Cart” to proceed with registration.
The program has now been added to your “cart” and payment can be taken.
Select “View Cart” in the top right corner to process payment and complete your registration to process.
In your cart, confirm the class information and select the green “Continue to check out” button.

Follow the prompts for payment to complete registration.
If you decide at any point during the registration that you do not want to take that class, you can choose Cancel & Clear the Cart and the registration will be voided.
REGISTER FOR A CLASS
The “Register for classes” tab will allow you to register for daily/drop-in classes, i.e. Cycle classes. To complete your registration:
Begin by selecting the “By Date” tab and the day you would like to review from the calendar provided. You can narrow your search using the filters provided at the top of the page, i.e. keyword or All Events menu.
All Events: use this menu to narrow down the class list, i.e. select Cycle to view only cycle classes
Once you have selected the day and completed the optional filters, select “Search classes”.


Classes scheduled for the week will now display. Identify the class you would like to register for and select “Sign Up” to register for the day. Click on the class name to view all days the class is offered.
After selecting “Sign Up”, you will be asked to select the user who will be registering for the class (multiple users can be selected).
After selecting the user name, click “Add to Cart” to proceed with your registration

The program has now been added to your “cart” and payment can be taken (when applicable). Multiple class registrations can be completed prior to completing registration through your cart.
Select “View Cart” in the top right corner complete your registration

In your cart, confirm the class reservation(s) and select the green “Continue to check out” button

Follow the prompts to enter payment (when applicable) and complete registration
Once you have complete the cart checkout, the user will be registered for the class and their spot secured on the roster!
To navigate back to the home page, select the home icon in the top right corner
VIEW MY STATEMENT
On the “View My Statement” tab, you can review all charges and payments on your member statement.
When logged in on a primary account, you can navigate between the statements of linked members by selecting the dropdown to the right of your name – highlighted in yellow in the picture below.
Statements are organized by month and will show all charges and payments generated in the month selected. To navigate between months, select the month dropdown menu found toward the bottom left side of the statement screen – boxed in red below.

PAY MY BILL
Navigate to this tab to pay outstanding balances. To begin, locate the “Select Payment Account” menu. Next, select the payment type you will be using for the transaction. Once the payment type is selected, enter the account information in the fields provided.

Next, select the payment amount, which will either be “Statement Balance” or “Current Balance”. After selecting the balance amount, click on the green “Continue” button to proceed with payment.

After selecting continue you will be prompted to verify your payment information and complete your payment. You will receive confirmation that your payment was completed and has been posted to your statement.
ACCOUNT ACCESS
This tab allows primary account holders to determine what linked members can access on their portals. For example, if a parent is the primary account holder and their children are linked to their account, they have the ability to allow or deny access to specific member portal features on the children’s accounts.
The features the primary account holder can allow/deny access to are listed below. Select the feature to allow access and uncheck to deny. Select “Save” in the bottom right to confirm changes.
View charges – if unchecked, the “View My Statement” tab is not visible on the members’ portal
Register for Classes – if unchecked, the “Register for Classes” tab is not visible and registrations cannot be completed

NOTIFICATIONS
Through the notifications tab you have the ability to turn on and off various forms of club email communication. To edit your notification settings, select “Edit” in the top right corner of the Notifications box.
To turn notifications on: ensure the “E-mail” box is checked to the right of the notification type
To turn notifications off: uncheck the “E-mail” box to the right of the notification type
Once the desired notifications have been selected, click “Save changes” in the bottom left corner to confirm notification preferences.

CONTACT US
On the “Contact Us” tab, you can send a message to the Tennis Center's email.


